


Cleveland Music Co.
DIY Pedal Enclosure Kit
DIY Pedal Enclosure Kit
Couldn't load pickup availability
Share


Just say no to offboard wiring and give your next pedal build top-mounted jacks without the butt-hurt of sourcing parts and drilling the top of the enclosure ... we've done all that for you!
This kit includes everything you need to build a professional quality, space-saving pedal enclosure and includes custom PCBs and premium hardware for all the I/O and switching components. And since everything in the kit is PCB mounted, most of the offboard wiring of a typical pedal build is eliminated. You just add your own effect board, drill holes for your controls, and solder just FOUR wires. Then rock out. Hard.
What's Included:
- A *pre-drilled* CNC Pro 125B aluminum enclosure from . It's ready to paint or customize any way you see fit. You will need to drill your own holes for your pedal's potentiometers and toggle switches, but the audio jack, DC power, footswitch, and LED holes are already drilled for you.
- PCB "daughterboard" for the audio I/O and DC power jack with support for reverse-polarity protection
- PCB daughterboard for the footswitch, LED, and additional power filtering capacitor
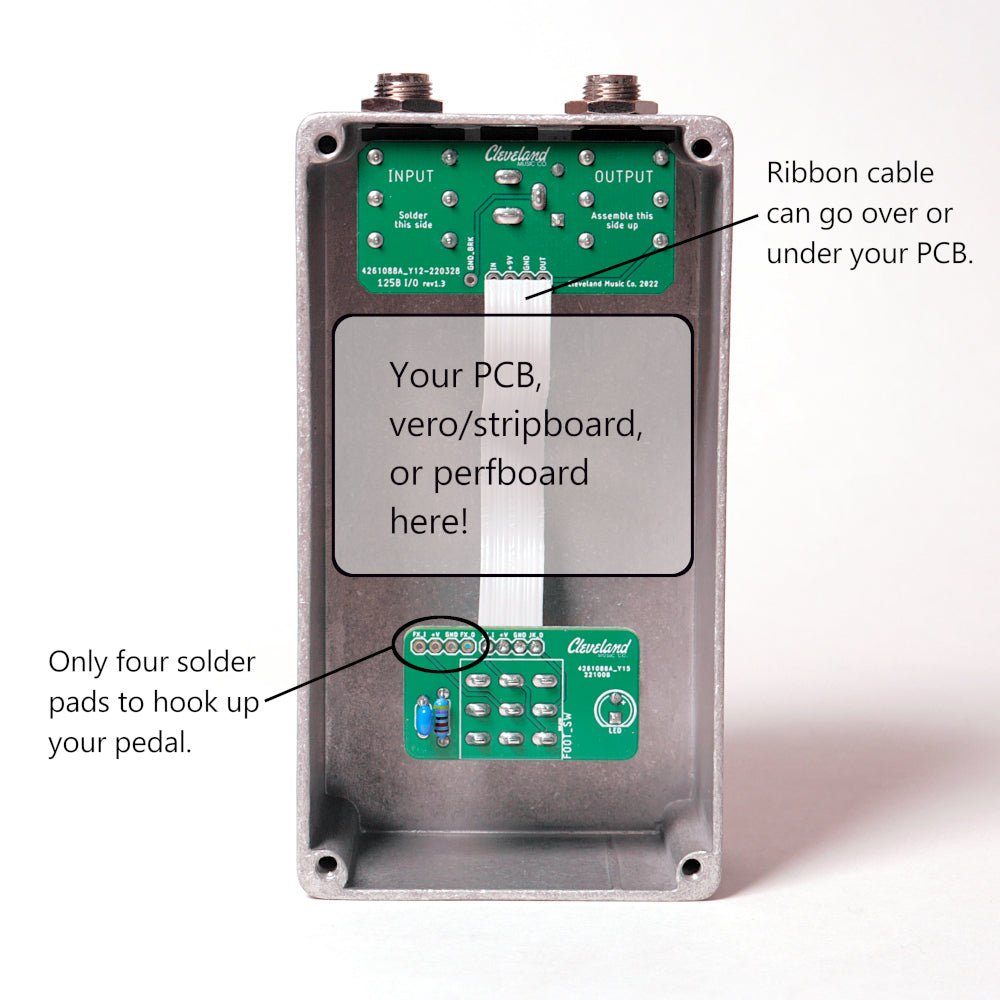
- 4-wire ribbon cable to connect the daughterboards
- 2 Neutrik NRJ6HM-1 PCB mount 1/4" mono audio jacks with dress nuts
- Kobiconn 7620-E DC power jack
- Premium feather-soft click 3PDT footswitch from (these are awesome!)
- 4k7 Royal Ohm metal film resistor (current limiting resistor for the LED)
- 3mm diffused red LED
- 1N5817 diode for polarity protection
- TDK 0.1uF MLCC capacitor with C0G dielectric
So what's left for YOU to do (once you've assembled the kit components)?
- You will need to drill holes in the enclosure for any potentiometers, switches, lasers, rocket launchers, etc. required for your circuit. Mount your effect board in the enclosure as you normally would.
- Then just wire your circuit's FX IN, FX OUT, +9V, and GROUND connections to the switching daughterboard on the provided solder pads.
- That's it.
- Seriously.
NOTE: Cleveland Music Co. can only offer very limited support for this kit. If you know what you're doing, you won't even need to look at the instructions, but if you're new to DIY pedal building and need some help, fret not: there are lots of communities on the Interwebs that will likely be more responsive to general questions than we can be. Cheers!